
| 일 | 월 | 화 | 수 | 목 | 금 | 토 |
|---|---|---|---|---|---|---|
| 1 | 2 | 3 | ||||
| 4 | 5 | 6 | 7 | 8 | 9 | 10 |
| 11 | 12 | 13 | 14 | 15 | 16 | 17 |
| 18 | 19 | 20 | 21 | 22 | 23 | 24 |
| 25 | 26 | 27 | 28 | 29 | 30 | 31 |
- Understanding Swift Performance
- viewcontroller
- IBOutlet
- WWDC16
- OperationQueue
- for-in
- uikit
- IBOutletCollection
- tableViewCell
- 동시성프로그래밍
- RunLoop
- Choosing Between Structures and Classes
- Remot Push
- firebase
- 후행 클로저
- 트레일링 클로저
- 진입점
- 원격 푸시
- AppTransportSecurity
- SWiFT
- DispatchQueue
- ios
- TableView
- 연산 프로퍼티
- CoreLocation
- weak
- userdefaults
- property wrapper
- UIButton
- entrypoint
- Today
- Total
iOS 공부하는 감자
iOS) Remote Notification (feat. Firebase) 본문
Remote Notification
서버로부터 받은 정보로 Push를 띄우는 것.
ex) 쿠팡 특가 알림, 이벤트 Push 수신 등..
시뮬레이터에서는 Remote Notification 테스트가 불가능 -> Local Notification만 테스트가 가능했다.
하지만 Xcode 11.4 이후로 시뮬레이터에서도 Remote Notification을 수신할 수 있도록 지원하기 시작했고, 별도 설정을 거치면 시뮬레이터에서도 테스트가 가능하다.
APNs (Apple Push Notification System)
Push Notification을 관리하는 애플의 시스템으로, 모든 푸시는 APNs를 통해 사용자에게 전달된다.
APNs를 사용하기 위한 Key는 애플 개발자 계정이 있어야 사용할 수 있다.
Remote Notification 동작 구조
- Device에서 APNs에 푸시 토큰 요청
- APNs는 Device에게 푸시 토큰 발급
- Device는 APNs에게 발급받은 푸시 토큰을 Provider(Push를 보낼 서버)에게 전달
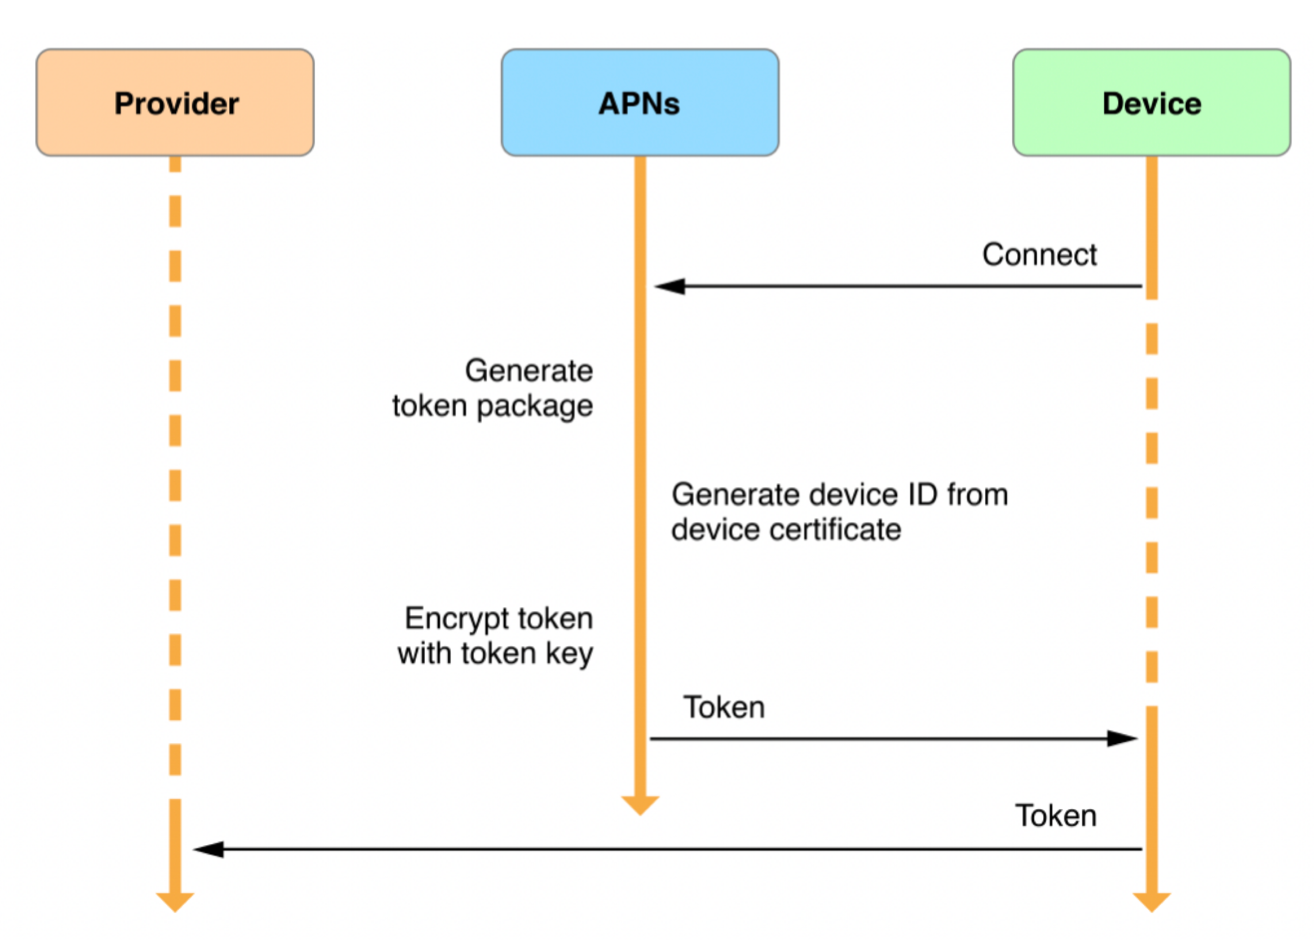
이후에는 Provider가 Device에게 받는 푸시 토큰을 사용하여 APNs에게 Push를 보내줄 것을 요청하고,
APNs가 사용자 디바이스에게 Push를 보내는 방식으로 동작한다.

푸시 토큰은 디바이스별로 고유한 값이기 때문에 카톡 채팅방과 같은 기능을 구현할 때 사용된다.
ex) A가 B에게 채팅을 보내면, 카톡 서버는 B의 푸시 토큰을 APNs에게 보여주며(?) B한태 노티를 보내달라고 요청
⭐️ 만약 회원탈퇴나 로그아웃과 같은 상황이 발생하면 토큰값을 삭제해줘야 한다.
삭제를 안한다면?? 다음과 같은 심각한 문제가 발생할 수 있다.
- 카톡을 로그아웃 했는데, 카톡방 노티가 온다.
- 다른 계정으로 로그인 했는데, 이전 계정의 카톡방 노티가 온다.
- 회원탈퇴를 했는데, 카톡방 노티가 온다.
Remote Notification 구현하기 >>
1. 애플 개발자 사이트 설정
위 사이트 접속
상단 메뉴 중 Account(계정)으로 이동
프로그램 리소스 중 "인증서(영문)" 으로 이동

Identifier 등록 (Bundle Identifier, Description 추가)
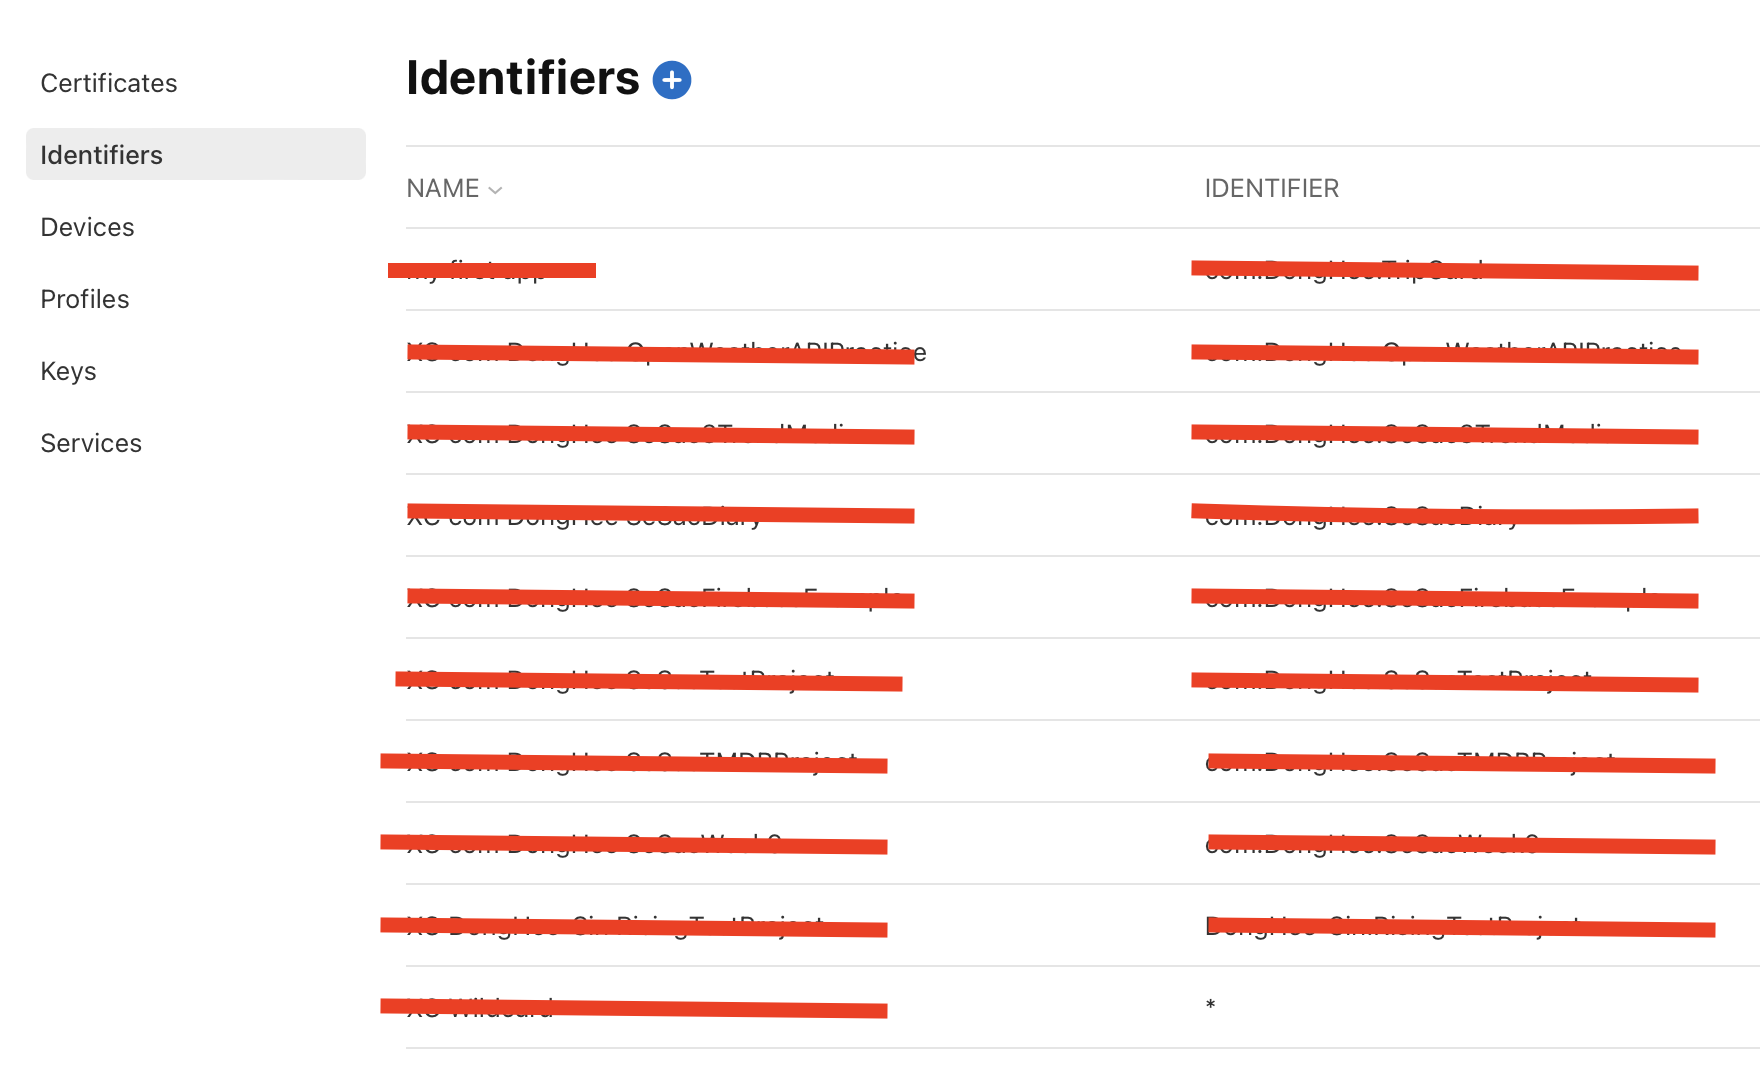

등록이 이미 되어있다면 해당 Identifier로 들어가서 Capabiliteis - Push Notification만 On으로 설정해주면 된다.

2. Apple 푸시 알림 인증 키 발급
유료 애플 개발자 계정이 등록되어야 Push Key 발급 가능
Key는 최대 2개 발급 가능하고, 하나의 Key를 여러 앱에서 사용 가능 (2개로 나뉜 이유는 테스트용, 배포용을 구분하기 위한.. 그런 목적)
1. Keys탭으로 이동
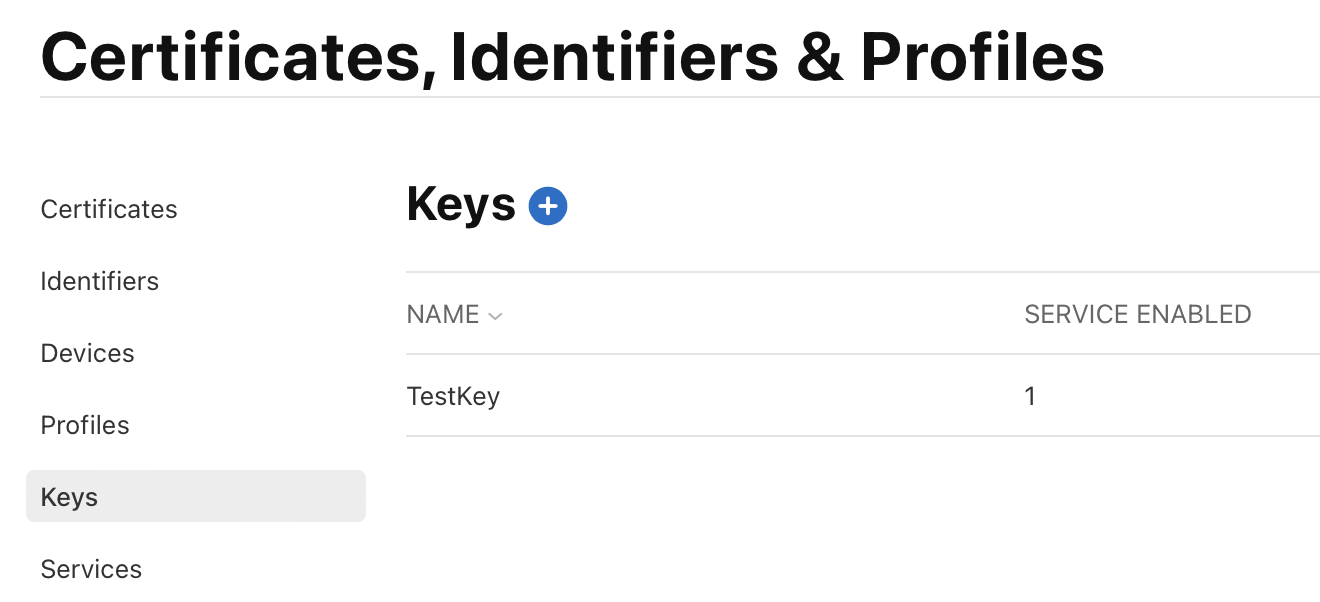
2. +버튼 누르고, Key Name 작성 & APNs에 체크
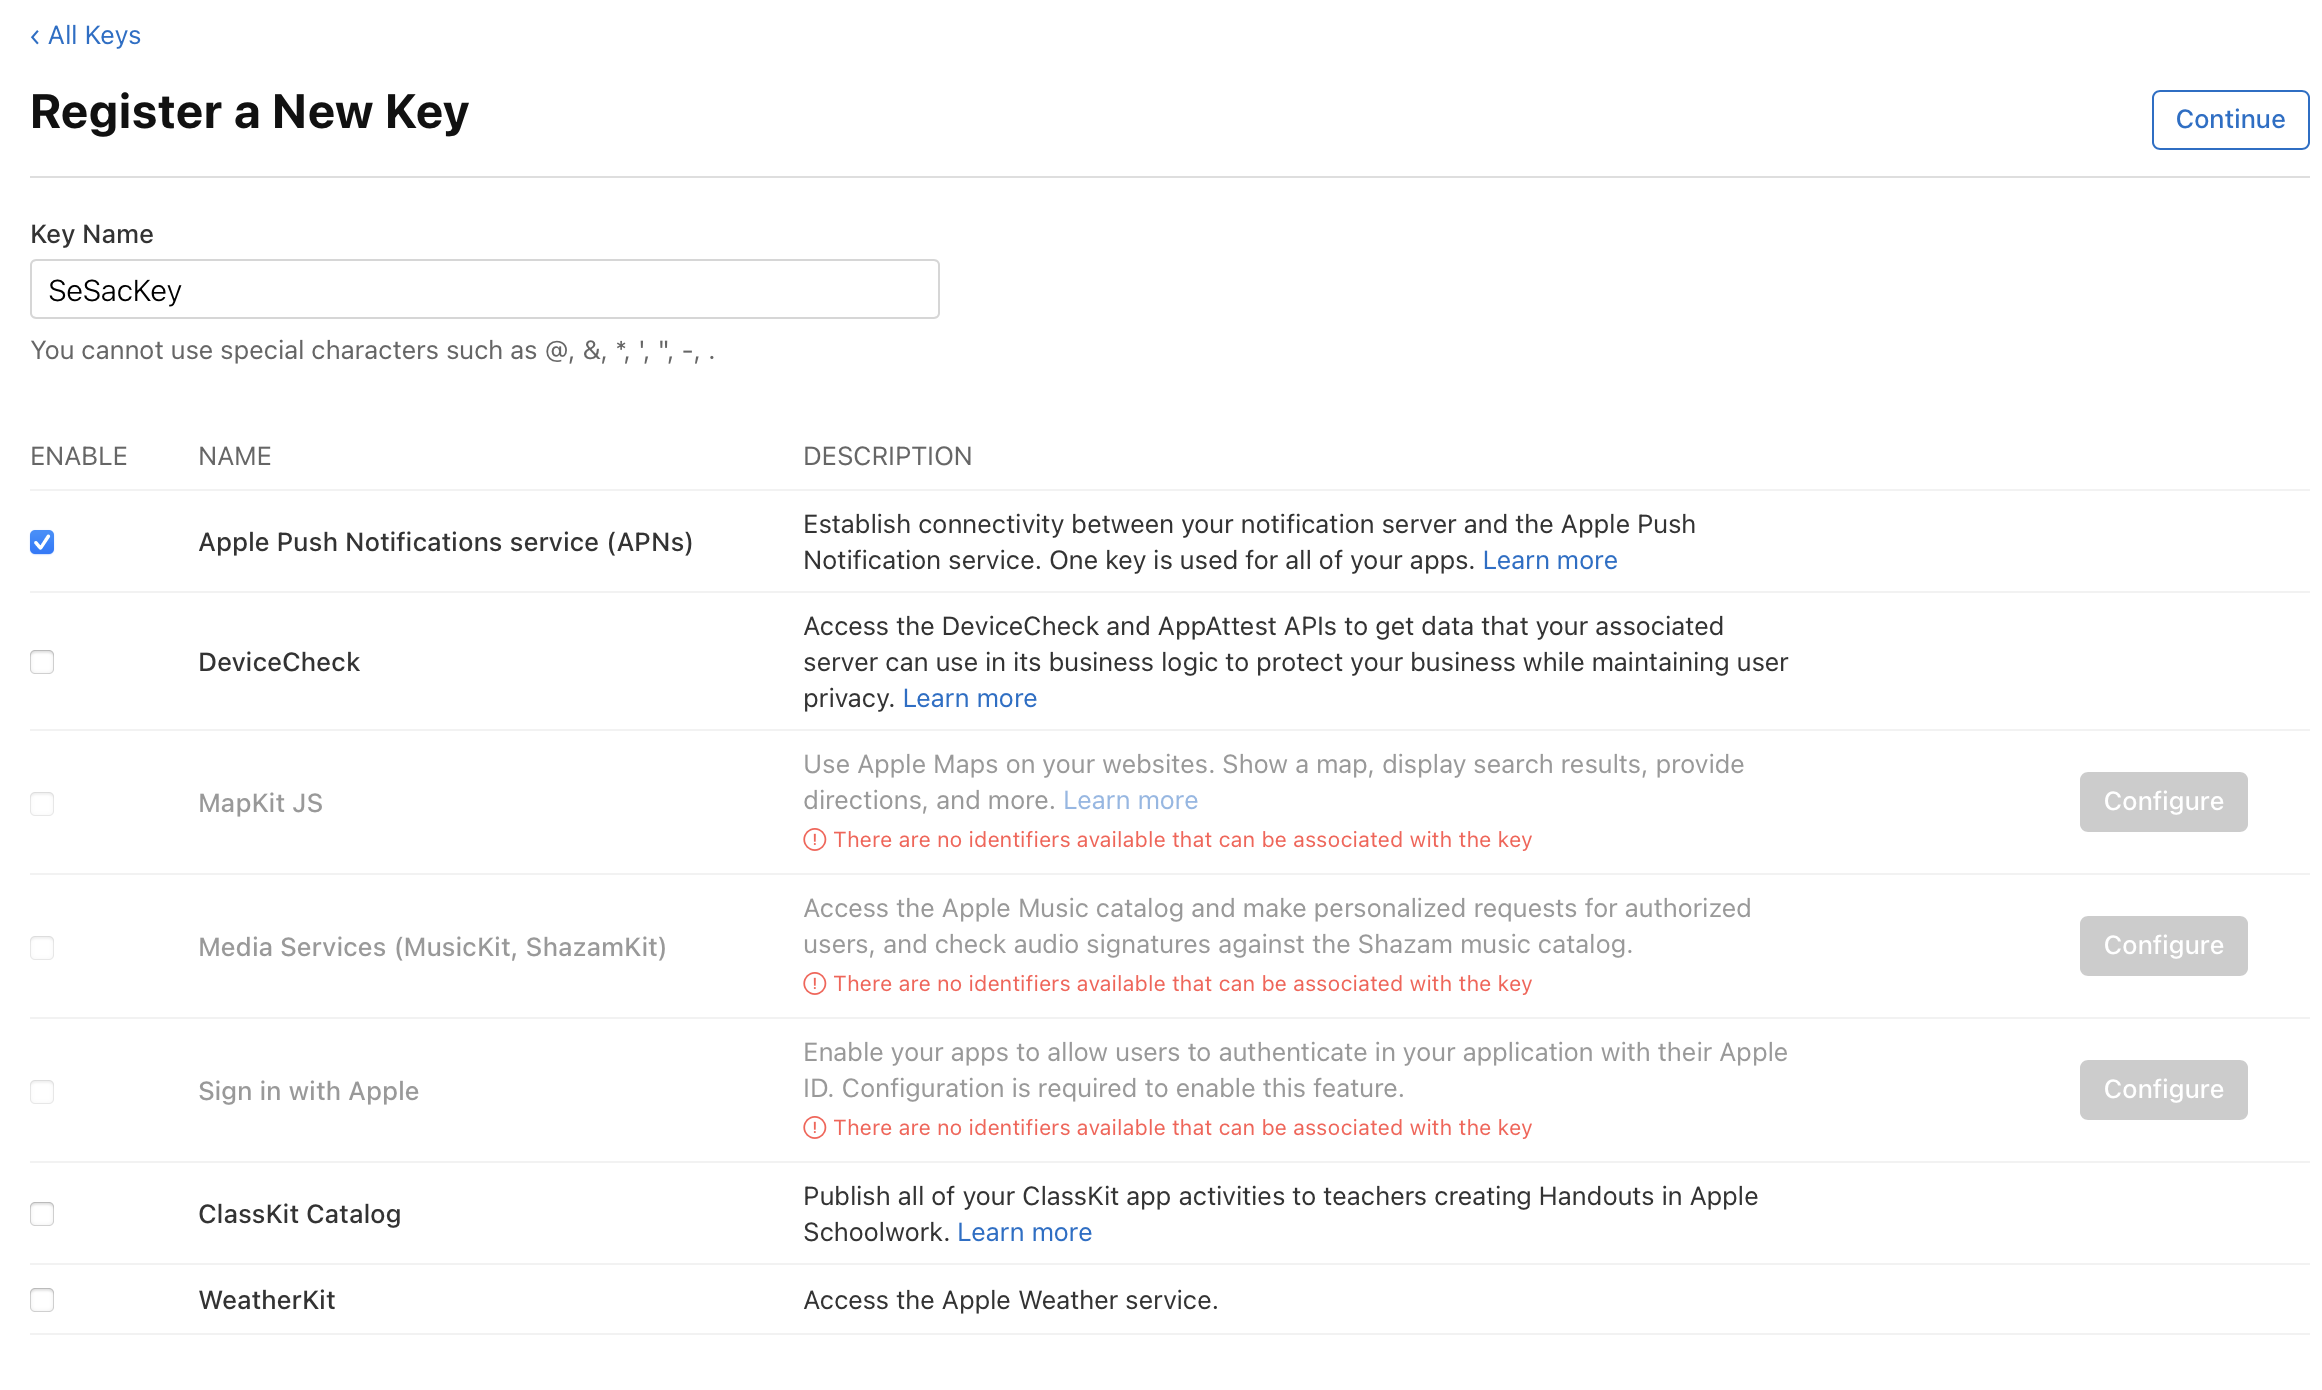
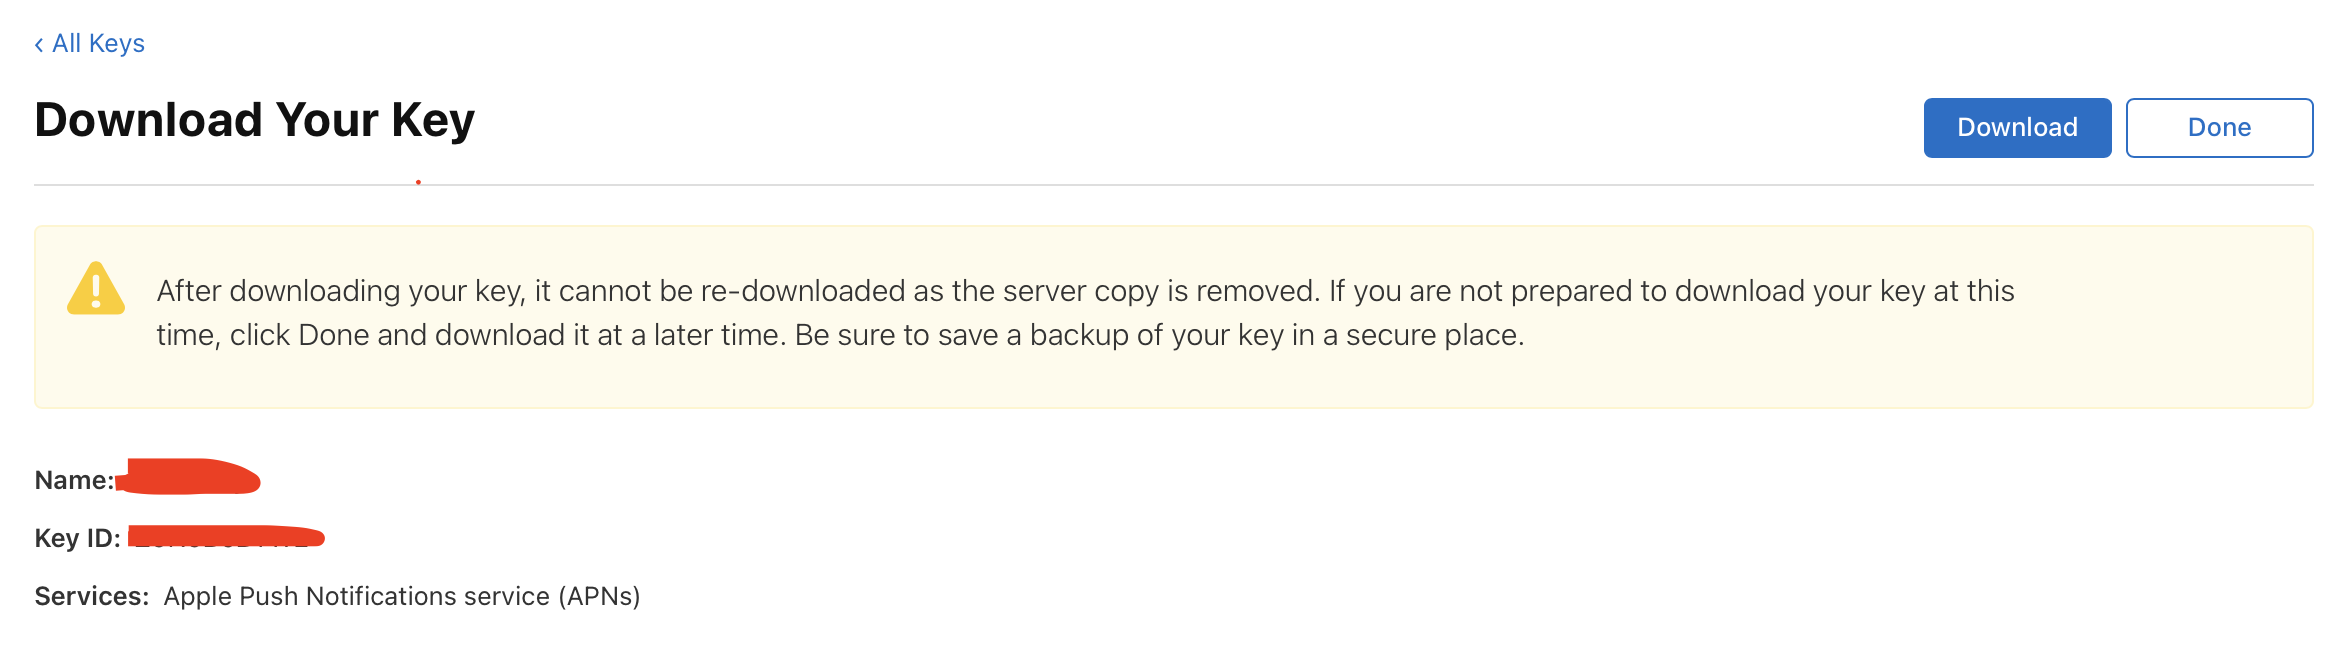
3. 생성된 Key 다운로드 ⭐️
다운로드는 Key를 발급받은 시점에만 1회 다운 가능하기 때문에 (p8)
다운받은 파일을 잘 관리해야 함!
Key의 확장자 - p8 VS p12
p8 인증서가 등장한 이후에는 p12 인증서를 잘 사용하지 않음
p8 :
- Public Key로 여러 앱에서 인증키 사용이 가능
- 만료 기한이 없다.
- 한번 다운로드 후 다시 다운받을 수 없기 때문에 인증키 관리가 필요
p12 :
- Private Key로 앱마다 개별 인증서가 필요 (개발용 푸시 인증서, 배포용 푸시 인증서)
- 만료 기한이 있어서 인증서 갱신이 필요 (1년) - 갱신을 하지 않고 만료 기한이 지나면 Push 송수신이 불가
3. Xcode) Push Notification 사용 설정
+ Capability에서 Push Notification, Background Modes 선택 & 추가

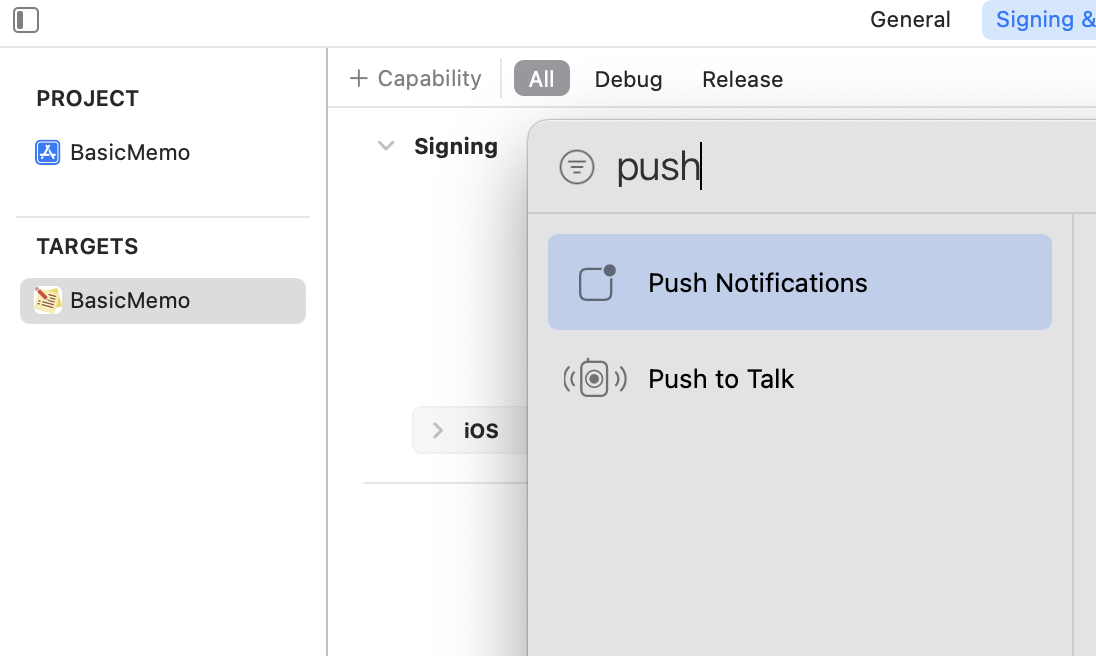

Background Modes에서 Remote notification 선택

4. Firebase Cloud System 연동
파베에서는 Push Notification을 Cloud Messaging Service라고 부른다.
https://console.firebase.google.com/u/0/?hl=ko
위 사이트로 접속
4-1. 프로젝트를 등록하지 않은 상태라면 프로젝트를 먼저 등록해준다.

4-2. Remote Notification을 구현할 프로젝트로 들어간 후, Firebase에 앱을 등록한다.
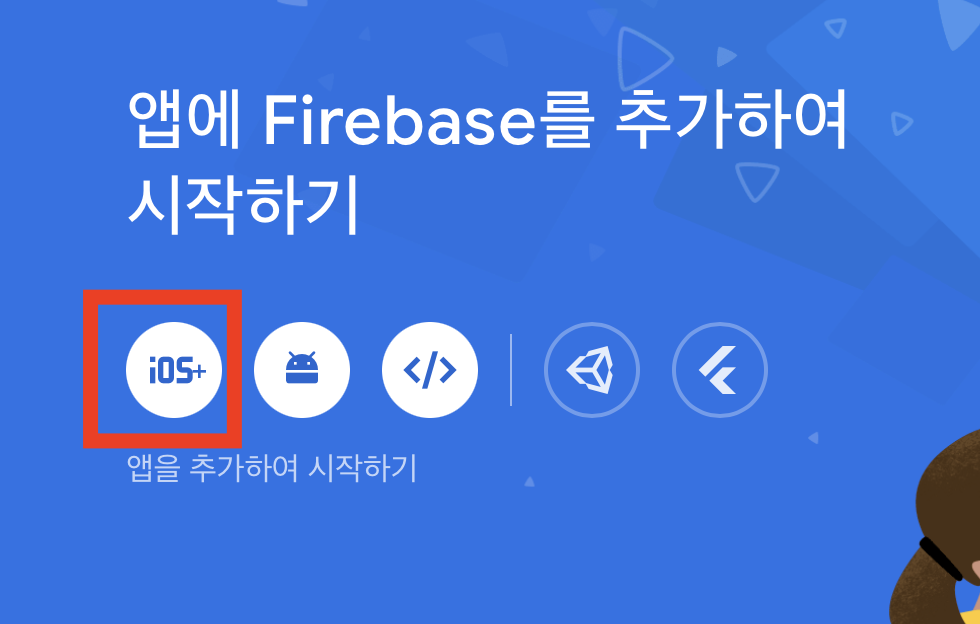
4-2-1. 앱 등록 : 번들 ID만 필수, 나머지는 선택사항
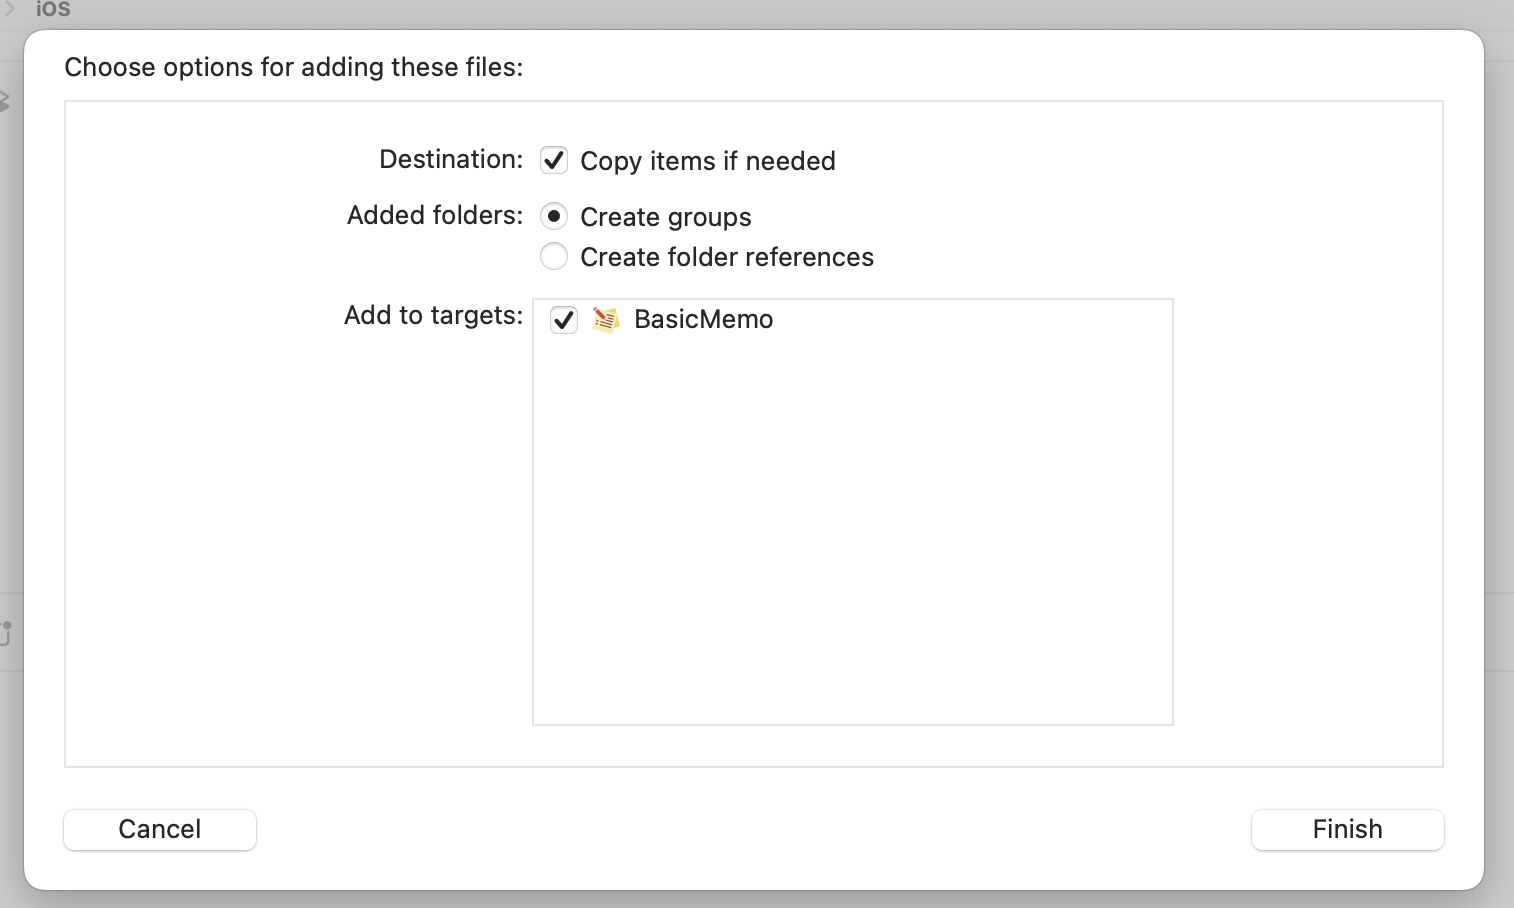
4-2-2. 구성 파일 다운로드
⭐️ 주의할 점
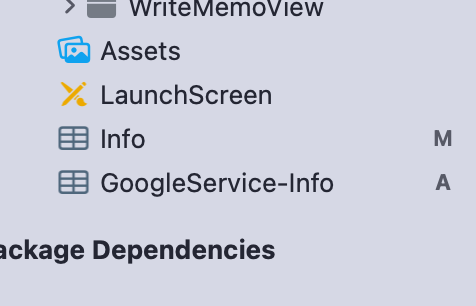
[구성 파일 다운로드] 단계에서 다운받는 plist파일을 프로젝트에 추가할 때, 이름은 반드시 "GoogleService-Info" 이어야 함!
이름이 중복되서 (2), (3) 이런식으로 이름이 달라지면 오류 발생하므로 확인 필요!

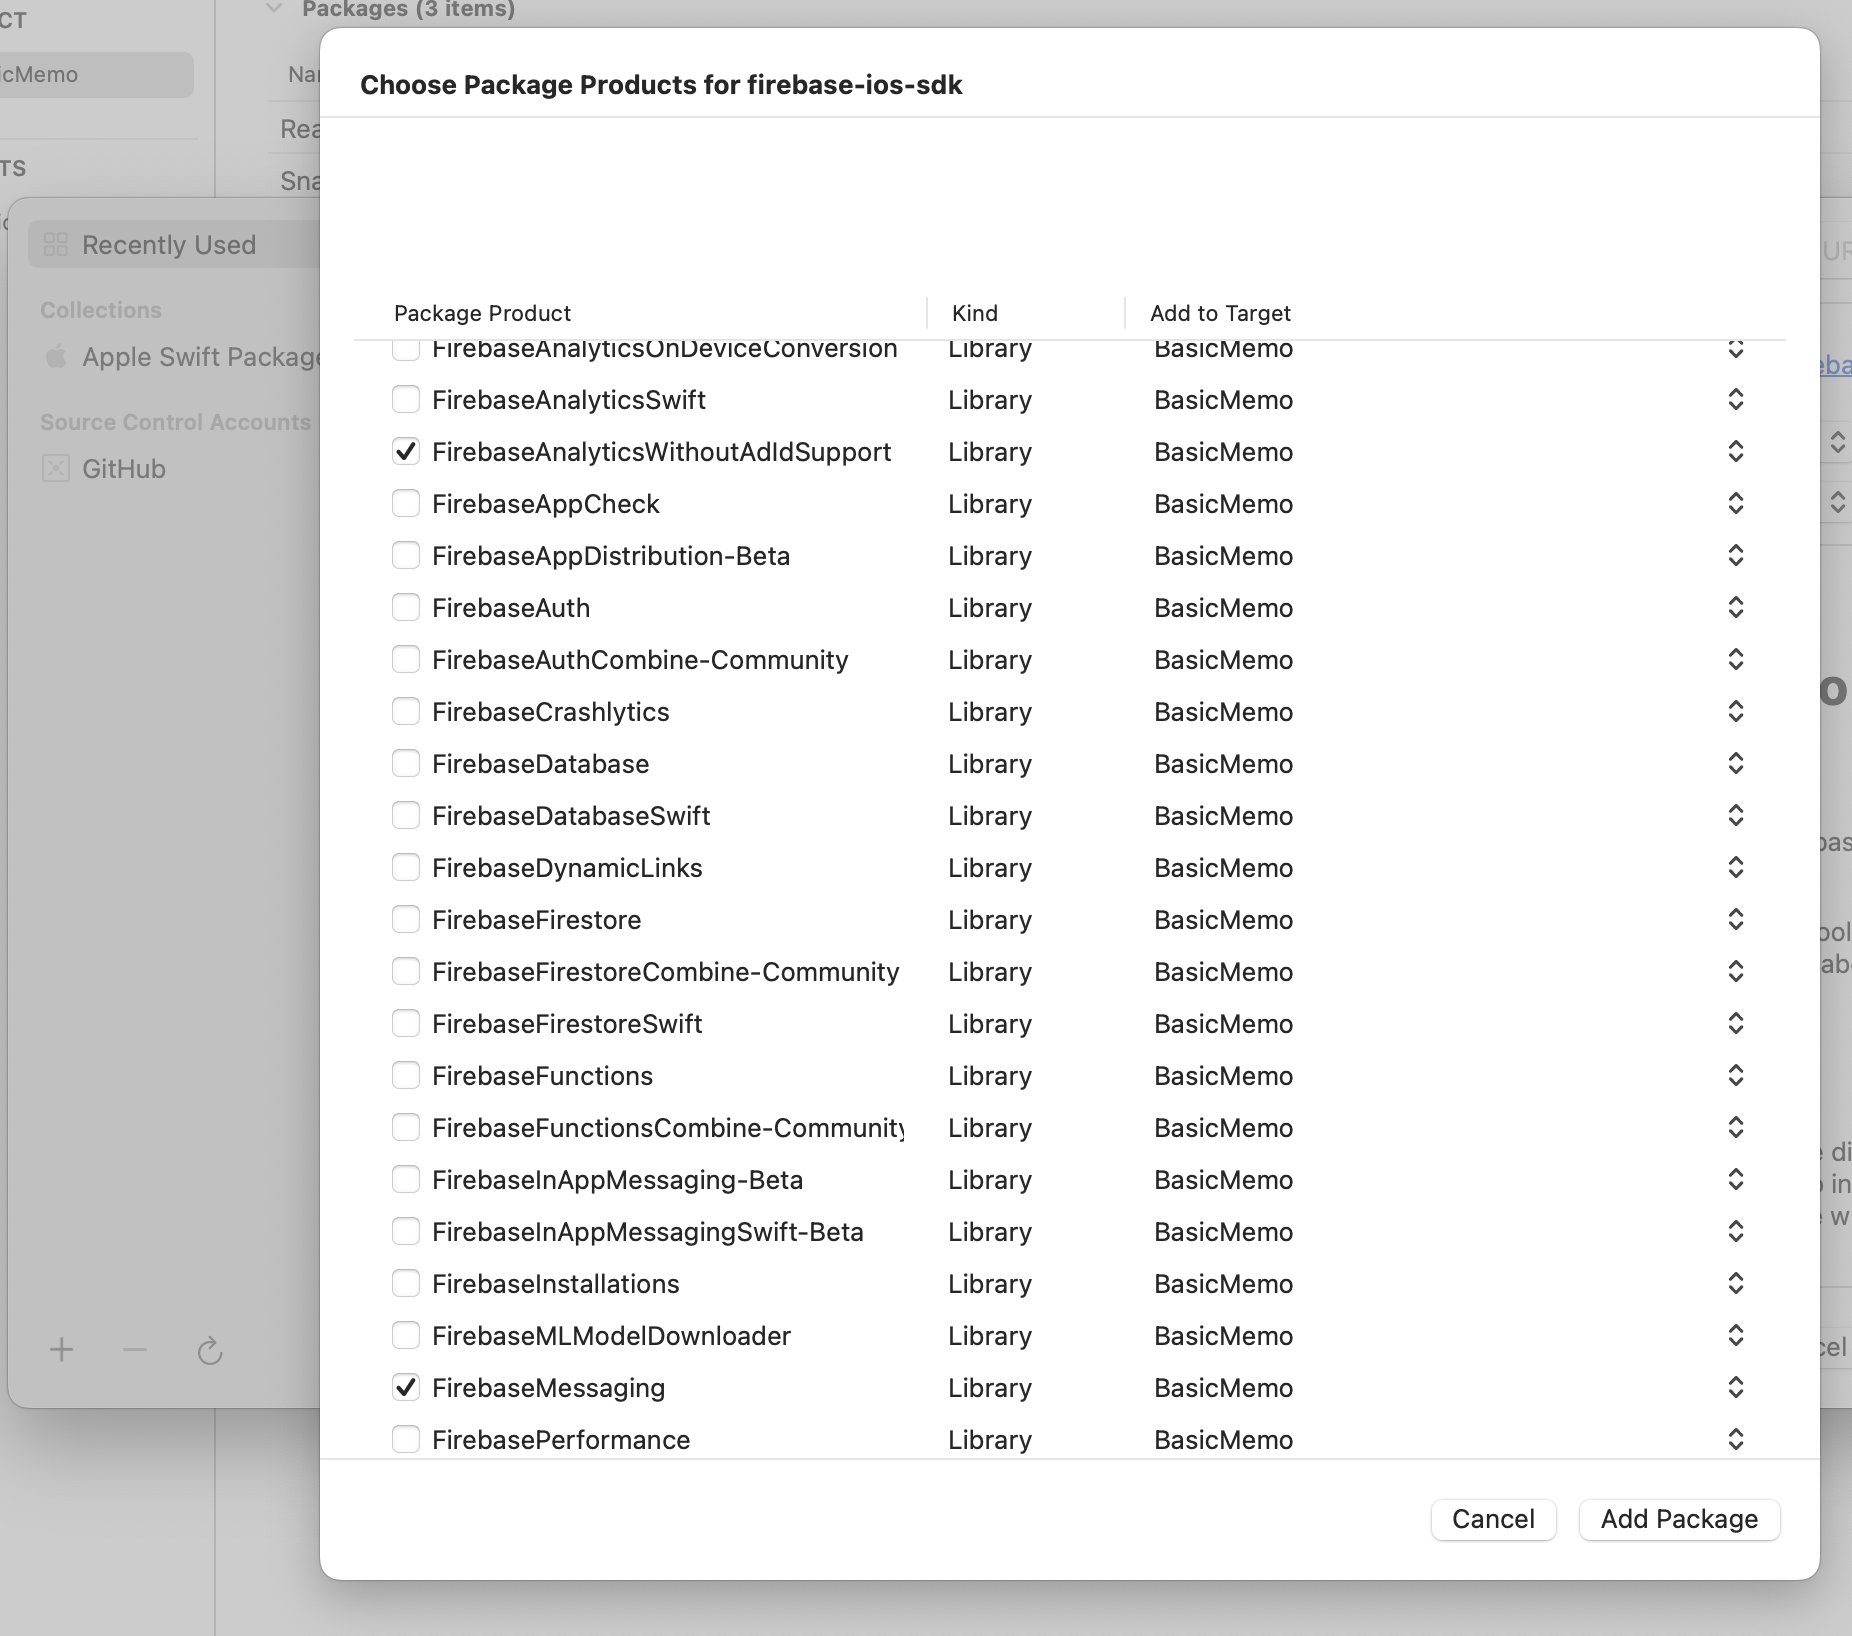
4-2-3. Firebase SDK 추가
SPM을 사용하여 Firebase 라이브러리 설치
사용 가능한 기능이 다양한데, Cloud Messaging Service를 이용하려면 FirebaseMessaging을 설치해주면 된다.
(Analytics는 앱 데이터 분석을 위한 것 -> 푸시 알림만 구현할거라면 설치할 필요는 없음)
4-2-4. 초기화 코드 추가
AppDelegate 파일에 라이브러리 import 후, didFinishLaunchingWithOptions 메서드에 초기화 코드 추가

4-3. 푸시 인증키 및 개발자 팀 키 등록
프로젝트 설정 -> 클라우드 메시징 탭 -> APN 인증 키 업로드

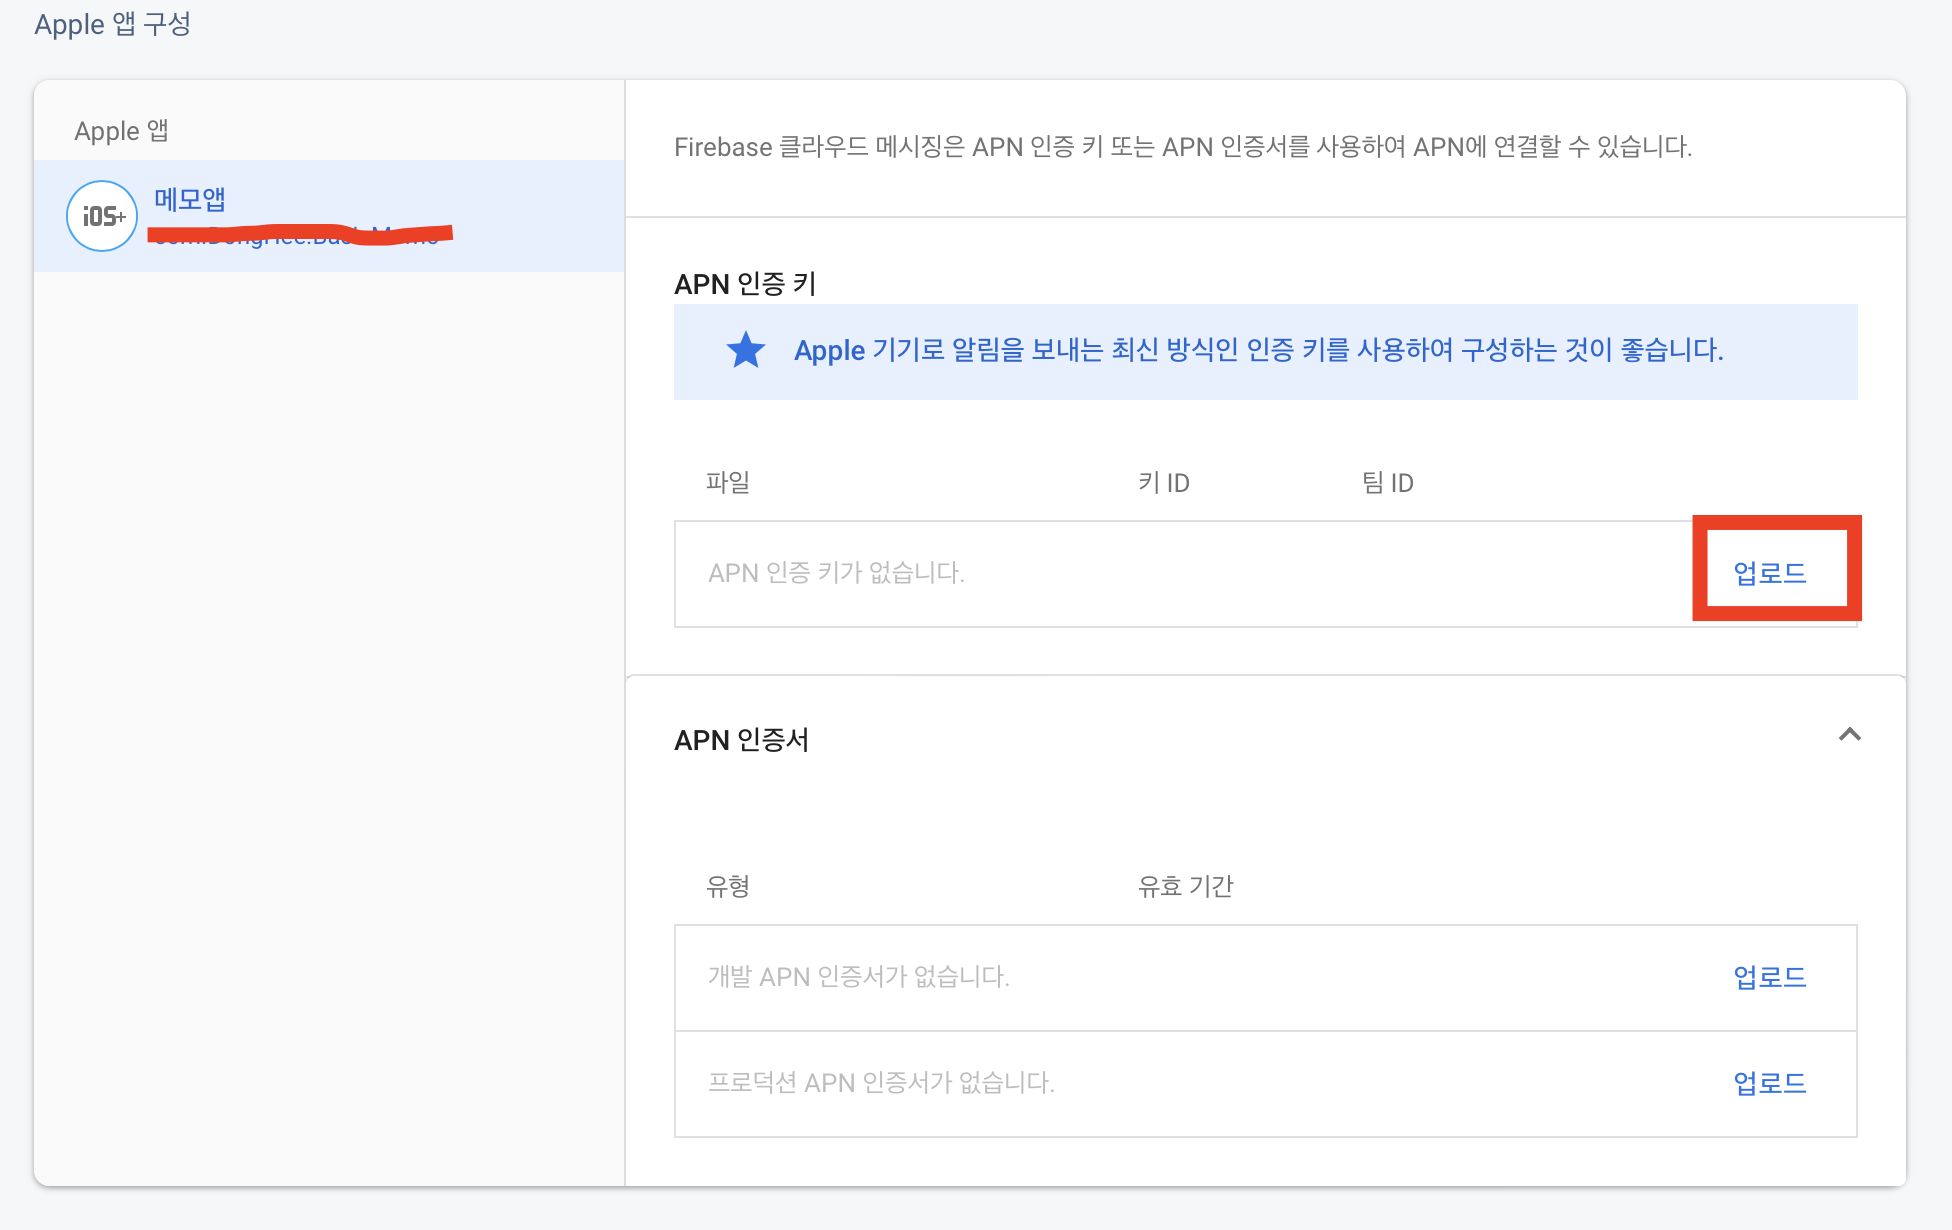

APN 인증 키 : "Apple 푸시 알림 인증 키 발급" 단계에서 다운받은 키 파일(p8)을 등록
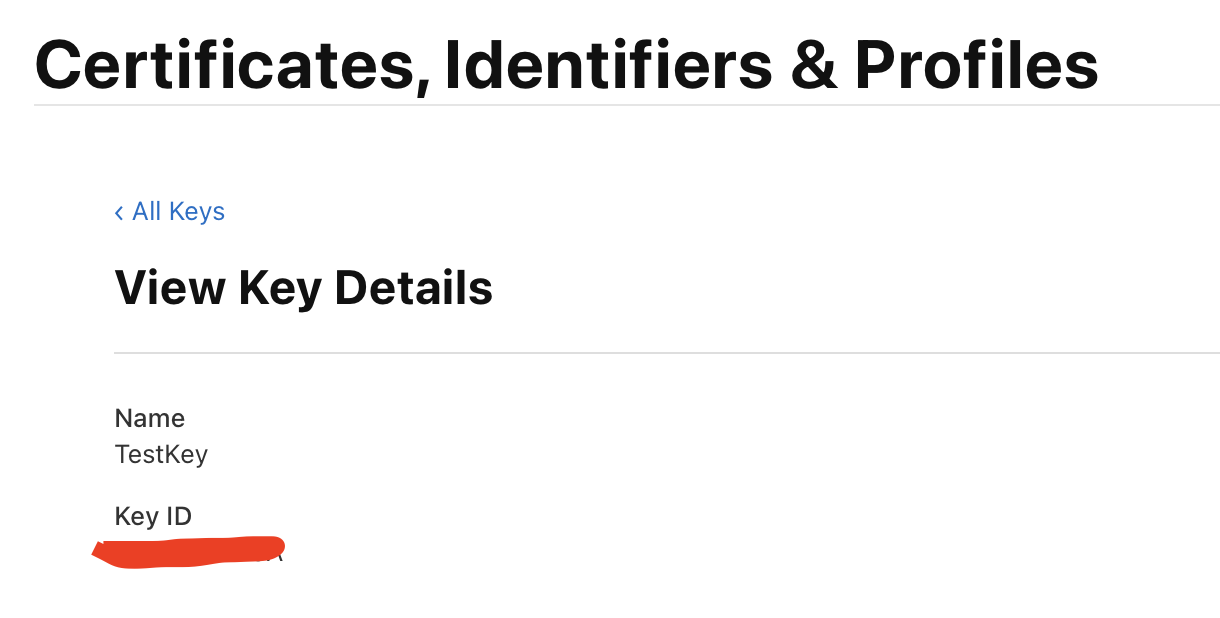
키 ID : Key 파일의 이름에서 확인하거나 애플 개발자 사이트에서 발급받은 Key의 상세정보로 들어가서 확인 가능
팀 ID : 애플 개발자 사이트의 계정 - 멤버십 세부 사항 부분에서 확인 가능

이후 작업은 공식문서에도 잘 설명되어 있음
https://firebase.google.com/docs/cloud-messaging/ios/client?authuser=0&hl=ko
5. 코드 구현
5-1. 원격 알림에 대한 권한을 등록해야 한다.
- iOS 시스템 정책으로, 원격 알림 시스템에 앱을 등록하는 과정이 필요 (UNUserNotificationCenterDelegate)
- Firebase를 사용하여 푸시를 전송하더라도 실질적으로는 Firebase가 APNs 서버에 푸시를 요청하고 APNs가 사용자에게 푸시를 전달하므로, 푸시의 실질적 발송 및 관리자는 애플 시스템의 영향을 받음
- + UNUserNotificationCenter의 Delegate 선언
// didFinishLaunchingWithOptions 메서드에 추가
if #available(iOS 10.0, *) {
  // For iOS 10 display notification (sent via APNS)
  UNUserNotificationCenter.current().delegate = self

  let authOptions: UNAuthorizationOptions = [.alert, .badge, .sound]
  UNUserNotificationCenter.current().requestAuthorization(
    options: authOptions,
    completionHandler: { _, _ in }
  )
} else {
  let settings: UIUserNotificationSettings =
    UIUserNotificationSettings(types: [.alert, .badge, .sound], categories: nil)
  application.registerUserNotificationSettings(settings)
}

// APNs 등록
application.registerForRemoteNotifications()
didRegisterForRemoteNotificationsWithDeviceToken
- 위 코드의 registerForRemoteNotifications() 메서드를 통해 RemoteNotification이 등록되면 호출된다.
- 매개변수로 입력받은 deviceToken을 Messaging(Firebase)의 apnsToken에 등록한다.
func application(_ application: UIApplication, didRegisterForRemoteNotificationsWithDeviceToken deviceToken: Data) {
    Messaging.messaging().apnsToken = deviceToken
}
5-2. 메시지 대리자 설정
- import FirebaseMessaging
- Firebase가 푸시 메시지를 대신 전송할 수 있도록 대리자를 설정하는 과정이 필요 (MessagingDelegate)
// didFinishLaunchingWithOptions 메서드에 추가
Messaging.messaging().delegate = self
5-3. UNNotificationCenter Delegate 메서드
5-3-1. willPresent
- 포그라운드 상태에서 호출되는 메서드 (백그라운드 수신은 기본으로 동작, 포그라운드 수신은 메서드 추가가 필요함)
- completionHandler로 "UNNotificationPresentationOptions"을 반환
- 사용자가 머무르고 있는 화면에 따라 포그라운드 상태에서의 푸시를 보여줄 지 아닐 지에 대한 분기처리가 가능 (ex. 카톡 채팅방에서 푸시를 띄우지 않는 기능)
func userNotificationCenter(_ center: UNUserNotificationCenter, willPresent notification: UNNotification, withCompletionHandler completionHandler: @escaping (UNNotificationPresentationOptions) -> Void) {
    completionHandler([.badge, .sound, .banner, .list])
}
5-3-2. didReceive
- Notification의 응답에 대한 처리를 하는 메서드로 UINotificationResponse타입을 매개변수로 받는다.
- 두 가지 경우에 호출된다.
- 사용자가 노티를 종료했을 때
- 사용자가 노티를 클릭하여 앱을 열었을 때
func userNotificationCenter(_ center: UNUserNotificationCenter, didReceive response: UNNotificationResponse, withCompletionHandler completionHandler: @escaping () -> Void) {

    print("Body: \(response.notification.request.content.body)")
    print("userInfo: \(response.notification.request.content.userInfo)")

    let userInfo = response.notification.request.content.userInfo

    // Notification 분기처리
    if userInfo[AnyHashable("sesac")] as? String == "project" {
        print("SESAC PROJECT")
    }else {
        print("NOTHING")
    }
}
5-4. MessagingDelegate 메서드
5-4-1. didReceiveRegistrationToken
- 등록 토큰이 수신되었을 때 호출(?)
- 토큰의 갱신을 모니터링한다.
- 새 기기에서 앱 복원
- 사용자가 앱을 삭제/재설치
- 사용자가 앱 데이터 소거
func messaging(_ messaging: Messaging, didReceiveRegistrationToken fcmToken: String?) {
    print("Firebase registration token: \(String(describing: fcmToken))")

    let dataDict: [String: String] = ["token": fcmToken ?? ""]
    NotificationCenter.default.post(
        name: Notification.Name("FCMToken"),
        object: nil,
        userInfo: dataDict
    )
    // TODO: If necessary send token to application server.
    // Note: This callback is fired at each app startup and whenever a new token is generated.
}
현재 등록된 토큰 가져오기
Messaging에 등록된 토큰은 MessagingDelegate 프로토콜 메서드인 "messaging:didReceiveRegistrationToken"을 통해 전달된다.
일반적으로 앱이 시작되는 시점에 등록 토큰을 사용하여 위 프로토콜 메서드를 1회 호출한다.
위 프로토콜 메서드가 호출되면 다음과 같은 작업이 가능하다.
- 새로 등록된 토큰이라면 애플리케이션 서버로 전송
- 등록된 토큰을 구독 처리(?) ==> 해당 토큰을 사용하여 필요한 작업을 처리한다는 의미인듯..? 토큰에 따라 푸시가 달라질 수 있으니
아래 코드를 사용하여 직접 토큰을 가져올 수도 있다.
Messaging.messaging().token { token, error in
  if let error = error {
    print("Error fetching FCM registration token: \(error)")
  } else if let token = token {
    print("FCM registration token: \(token)")
  }
}
6. Remote Notification 전송
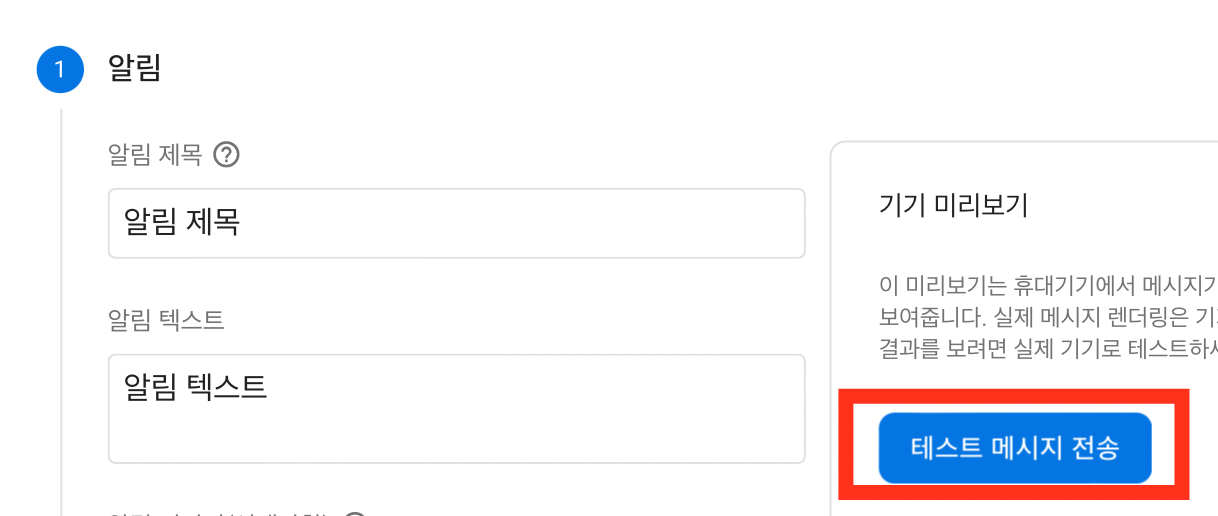
6-1. 테스트 메시지 전송
코드가 다 작성된 상태에서 빌드하면 콘솔창에서 토큰을 확인할 수 있다. (위 코드를 그대로 작성했다면 2회 출력됨)
- didReceiveRegistrationToken 메서드에서 출력
- Messaging.messaging().token(completion:)을 사용하여 출력

Firebase에서 Noti를 구현할 프로젝트로 접근 후 다음의 같은 순서로 들어간다.
Messaging > 첫 번째 캠페인 만들기 > Firebase 알림 메시지 체크 & 만들기


테스트 메시지 전송 > 콘솔에서 확인한 토큰을 입력 > 테스트

테스트 노티가 잘 도착하지 않으면 확인할 내용
- 토큰이 정확하게 입력되었는가?
- 실기기 또는 별도 설정이 되어있는 시뮬레이터에서 테스트를 했는가?
6-2. 알림 작성 (생성)
1. 알림으로 보여줄(?) 데이터

2. 알림을 보낼 Target 앱 설정

3. 언제 보낼지 설정
- 지금, 특정 시점 설정 가능 & 반복 설정 가능
- 지금으로 보내도 n분의 시간은 걸릴 수 있음 (APNs로 요청을 지금 하는 것일 뿐)

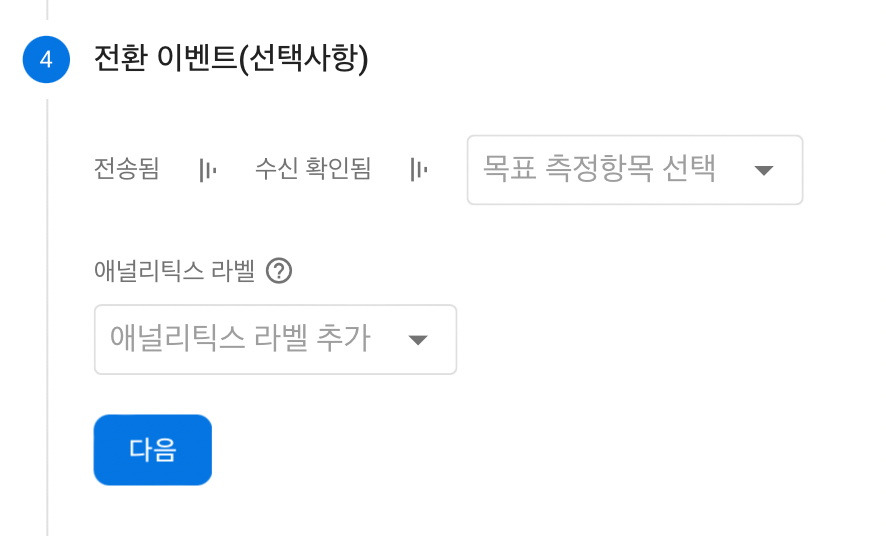
4. 전환 이벤트(?)
나중에 무슨 내용인지 찾아보기..
5. 추가 옵션 (선택사항)

맞춤 데이터 :
- Push를 분기처리하기 위해 필요한 내용
- 여기서 입력한 Key : Value는 "5-3-2"의 코드에서 작성한 분기처리에 사용된다.

func userNotificationCenter(_ center: UNUserNotificationCenter, didReceive response: UNNotificationResponse, withCompletionHandler completionHandler: @escaping () -> Void) {

    print("Body: \(response.notification.request.content.body)")
    print("userInfo: \(response.notification.request.content.userInfo)")

    // [AnyHashable : Any] 타입
    let userInfo = response.notification.request.content.userInfo

    // Notification 분기처리
    if userInfo[AnyHashable("sesac")] as? String == "project" {
        print("SESAC PROJECT")
    }else {
        print("NOTHING")
    }
}
만료 :
- 사용자 디바이스에 노티를 보여준 후, 사라지는 만료 기간 설정
- 4주로 설정하면 노티를 띄운 후, 4주가 지나면 사라지도록 함
내용을 다 작성하면
"검토 > 게시" 순서로 버튼을 클릭해서 알림 등록
6-3. 알림 수신
알림을 게시하면 아래 화면으로 이동된다.
게시된 알림 목록을 확인할 수 있고, 새 캠페인을 누르면 새로운 알림을 생성할 수 있다.
등록된 알림의 시작 시간은 36분, 40분인데 실기기에서는 51분에 알림이 수신되었다. (앞서 설명했듯이 n분의 딜레이가 발생)


연습 프로젝트
https://github.com/DongHee-Sin/SeSac_Week14_FirebaseExample
GitHub - DongHee-Sin/SeSac_Week14_FirebaseExample: ☘️ SeSac 14주차 학습
☘️ SeSac 14주차 학습. Contribute to DongHee-Sin/SeSac_Week14_FirebaseExample development by creating an account on GitHub.
github.com
Interruption Level
https://developer.apple.com/documentation/usernotifications/unnotificationinterruptionlevel
- iOS 15~
- 알림의 수준을 다르게 설정 가능
timeSensitive 속성
- 사용자 디바이스가 방해금지모드여도 알림을 전달
- timeSensitive 레벨의 푸시를 여러 번 받게 될 경우, 사용자에게 레벨을 내릴 지에 대한 얼럿을 시스템에서 띄워줌
- 아이폰 설정에서 각 앱에 대해 긴급한 알림 수신 여부를 거부하면, timeSensitive 레벨의 푸시도 Active 레벨로 전달
'iOS' 카테고리의 다른 글
| iOS) 위치 정보 사용하기 (CoreLocation) (0) | 2022.08.15 |
|---|---|
| iOS) nib, awakeFromNib (0) | 2022.08.14 |
| iOS) Run Loop (0) | 2022.08.08 |
| iOS) ViewController에서 TableViewCell 내부의 Button Action 처리하기 (2) | 2022.07.27 |
| iOS) CollectionView - FlowLayout (0) | 2022.07.20 |

